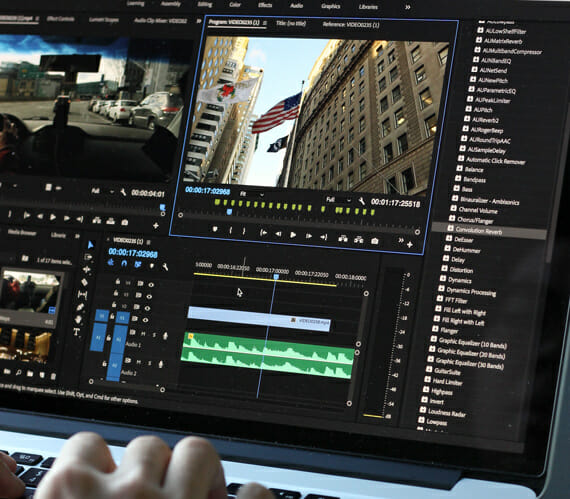
Videos run the Internet show.
Global video traffic is expected to be 80 percent by 2019. In fact, Facebook generates 8 billion video views each day. That speaks volumes about the effectiveness of video marketing.
But here’s the caveat:
Buying an expensive camera, shooting footage from glamorous locations, and featuring emotional pictures in your video marketing stories won’t get you the engagement and the traffic you need. If you don’t edit your videos, none of those things will matter.
Thus, knowing how to edit videos is essential. The good news is you don’t have to spend millions to learn the art of video editing. Anyone can learn tips and tricks for professional video editing. This article teaches you how to edit videos in five simple steps.
How To Edit Videos: The 5 Techniques That Work
Below are the five effective techniques for video editing. The tips, when used, will surely help communicate your business message and polish your brand.
1. Edit to Your Audience
Video marketing is audience-driven.
When editing your videos; therefore, you should edit the content, the message, and even the music in a way that it will appeal to your audience. So, understanding your audience is critical. And the best way to understand your audience is to create a buyer persona.
Fortunately, that’s not difficult. You can create a buyer persona by conducting interviews and research about your target audience. A good way to start?
Research your persona’s background (family, careers path), demographics (gender, age), and identifiers (behavior, communication preference).
Those respected viewers are the main reason you’re in business.
- They’re the ones who will consume your video content.
- They’re the ones who will share your videos with their peers.
- They’re the ones who will act upon your videos—if your call to action entices them.
When you know your audience in and out, it’s time to move on to the next stage:
2. Organize Your Rough Footage in One Folder
Now that you’ve defined your ideal buyer and even created a buyer persona, your next line of action is to assemble your rough footage in one folder.
- Open a new folder on your desktop.
- Name the folder.
- Copy-paste your shots, your B-roll footage (plus other important visual elements) into the folder.
The idea is to create your own video store, so to speak. Doing so will keep you organized. Whenever you want to pick any clip or shot, you know exactly where to pick them.
Plus, you can access them without any hassle…without any waste of time.
3. Import the Rough Footage in Your Video Editing Software
Importing one image in a video editing program is energy-draining. It’s also time-consuming.
A faster way to edit a video? Import all your rough footage in your video editing software. Just ensure that you clean up the clips as you gather them in your editing program.
This process is effective. Importing all your footage in one place will give you a feel as to how your work will fit together and saves you more time. But the real video editing process starts when you begin to roll the shots and start making decisions about what part of the video to cut and what part to trim.
Let’s talk more on that next.
4. Cut “On the Action”
Cut “on the action” if you want your videos to stand out.
For beginning video editors who might not know what that means, here’s a simple explanation: Cutting on the action is a process of cutting from one shot to another and matching the action of the shots.
If, for instance, you’re editing a sequence of a person drinking bottled water… Before they place the bottled water on their lips, cut to the shot of the person at the precise moment that they’re drinking the water.
This cutting technique is effective. “Your film will develop a better ‘flow’ [when you do the ‘on the action’ cut], a video editing expert Jonathan Paul says. [It will also] result in a much smoother transition and a more tense action scene.”
5. Apply Custom Text Overlays and Visuals for a Professional Look
Professional marketers are powerful communicators.
They understand that, for marketing videos to convince and convert, deep voiceover isn’t enough. The video must be decorated with beautiful text overlays to make a message punchy, powerful, and persuasive.
So…you’ve got to always apply custom-made text overlays when you’re editing your videos. You should also add visuals. Those pictures and stock B-roll footage will make your video content more beautiful and appealing to your viewers.
Great CEOs and influencers are using both text overlays and visuals to spruce up their video content. Robin Sharma, the American productivity guru; for example, uses gorgeous text overlays in his YouTube videos to emphasize his points.
And it’s one of the reasons why we love watching his super valuable videos. The point? Always overlay custom texts and visuals into your videos. Those little features will fine-tune your videos and polish your brand.
The Bottom Line
Learning how to edit videos is all about investing more time to connect the dots, to breathe life into those shots, to make your footage act your marketing story.
Beyond investing in the right camera or video editing software, doing effective video editing starts with these five effective techniques:
- Understanding your ideal buyer.
- Assembling your footage in a single file.
- Importing all your footage in your video editing software.
- Knowing how to cut “on the action” and
- Applying text overlays and visual assets to make your videos look professional.
It’s that simple. But you’ve got to invest your time and work tirelessly to produce quality video content. Because, “Editing is where movies are made or broken,” the American film director and editor Joe Dante suggests. “Many a film has been saved and many a film has been ruined in the editing room.”
See our favourite video on 5-tricks you can use to edit faster in Premiere Pro.


